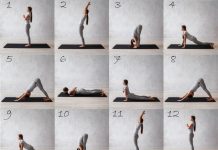
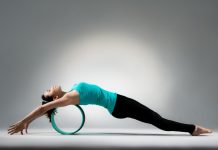
A form of yoga that aims to promote physical, mental and emotional relaxation with the use of props is known a Restorative Yoga. Derived from a style of yoga, Ivengar Yoga, that was invented by one of the yoga masters renowned around the world, B.K.S, Iyengar, the use of props to ensure poses are not only done correctly but also to allow an individual to hold poses for a long time without the risk of injury, twists and discomfort.
Restorative yoga involves backbends, light twists and forward folds while seated that usually lasts for five minutes for each pose. Its benefits include healing of the boy and mind, depression and anxiety management as well as immunity to ailments and injuries related to stress. This form of yoga also targets different parts of the body while some poses specifically affect the heart and the lungs. Let us look at the different poses of Restorative Yoga.
Legs-Up-the-Wall Pose or Viparita Karani
This passive pose requires the use firm bolster or of one or two blankets, thickly folded, where the yogi will rest the legs almost vertically on a wall. There are two considerations about the support when performing this pose: height and wall distance. If the person has a flexible body, the support should be higher and closer to the wall. For a person who is not flexible, support should be lower and farther to the wall. If the person is tall, there should be more distance from the wall and for a short person, it is the opposite.
Step 1:
Place support should be around five to six inches from the wall and sit sideways on the right side of the support and the right side of the body against the wall. Breathe out and swing the legs up on the wall while the shoulders and head are rested on the floor.
Step 2:
With the support on your spine, ensure that your buttocks are not touching the floor and that your front torso is gently arched from the pubis to the shoulders. Bend the knees and press the feet on the wall while lifting the pelvis from the support a few inches away.
Step 3:
Lift the base of the skull and release it away from the back of the neck. Instead pushing the chin towards the sternum, lift the sternum towards the chin. Open the shoulder blades and release the hands and arms out to the side with palms up.
Step 4:
With the legs remaining firm and vertical to the wall, release the thigh bone heads as well as the weight of the mid-part of the body into the torso directed to the torso. Turn the gaze to the heart.
Step 5:
Keep this pose between five and fifteen minutes but see to it that the support will not be twisted as you come out of the pose. Slide off from the support instead and turn to the side. An alternative is to bend the knees and push the feet from the wall to remove your torso from the lift. Next, move the support to the other side while the pelvis is in the air and gently release. Turn to the side and stay that way for a few breaths until coming to a sitting position while breathing out.
Child’s Pose or Balasana
Step 1:
While kneeling on the floor, try to reach the big toes together and sit on the heels. Next, separate the knees as wide as the hips.
Step 2:
Breathe out and bring the torso down to the thighs. Widen the sacrum and narrow the hips joints toward the navel so they will rest on the inner thighs. Lift the base of the skull from the back of the neck while stretching the tailbone from the back of the pelvis.
Step 3:
With the hands on the sides with palms up, release the front shoulders toward the floor. By this time, you will feel the weight of your shoulders pull the shoulder blades across the back.
Step 4:
Stay in this pose from 30 seconds and longer. To come out from this pose, lengthen the front torso and while breathing in, lift from the tailbone and into the pelvis.
Supported Pigeon Pose
With a bolster, blanket or folded towel, support the front of the pelvis. Place the hip, shin and right knee on the support and extend the left leg. Press the torso on the hips and with another bolster, rest the forehead or the chest to soften the shoulders and neck. Breathe deeply and retain the pose for five minutes. Do the same on the other side.
Corpse Pose or Mrtasana
Step 1:
In a neutral position, sit on the floor on bended knees, with feet on the floor and the back onto the forearms.
Step 2:
Push the back of the pelvis using the hands toward the tailbone with the pelvis lifted from the floor. Breath in extend the right leg slowly and then the left while pushing with the heels. Soften the groins by releasing both legs.
Step 3:
Lift the base of the head away from the back of the neck using the hands and release. Lift the crease of the neck diagonally to broaden the base of the head.
Step 4:
Lift the arms perpendicular to the floor and rock lightly from one side to the other. Release the arms while angled evenly to the mid-line of torso. Rest the back of the hands on the floor.
Step 5:
Remain in this pose for about five minutes every 30 minutes. To come out of the pose, roll slowly while breathing out from the right. Release two to three breaths. Next, breathe out while pressing the hands on the floor and lifting the torso. See to it that the head comes up last.
There are other Restorative Yoga poses perfect for beginners and advanced yogis. By using different props and following the instructions carefully, total relaxation of the mind, body and soul is possible.
47 Most Famous Motivational Quotes of All-Time
49 Greatest Love Quotes
37 Inspirational Quotes that Will Change Your Life


